You can choose different layouts and options to show the information you prefer.
To switch views in a schedule:
1. Select a distribution type from the Layouts menu in the toolbar:
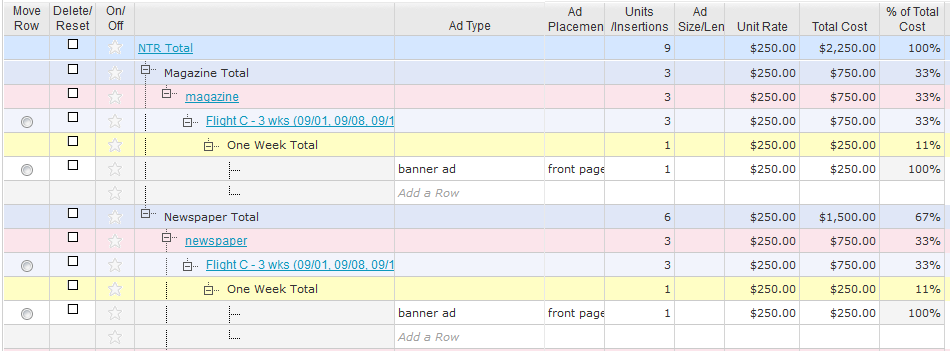
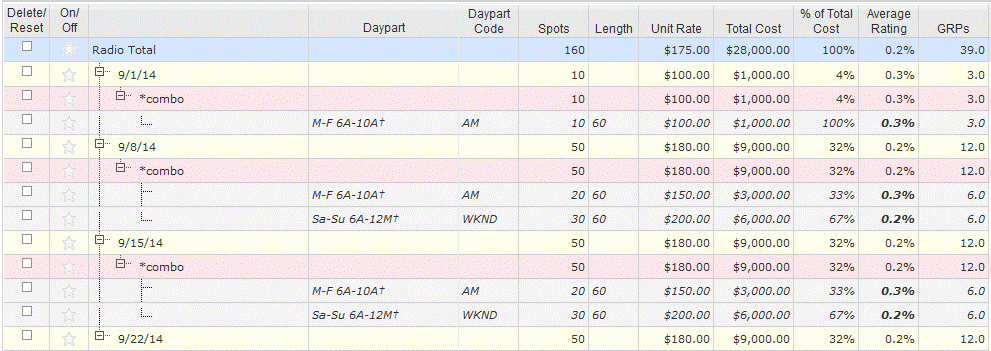
• Station or Vendor Distribution — the default view shows rows grouped by station or vendor, week, and daypart or ad type.
Station Distribution view...

Vendor Distribution view...

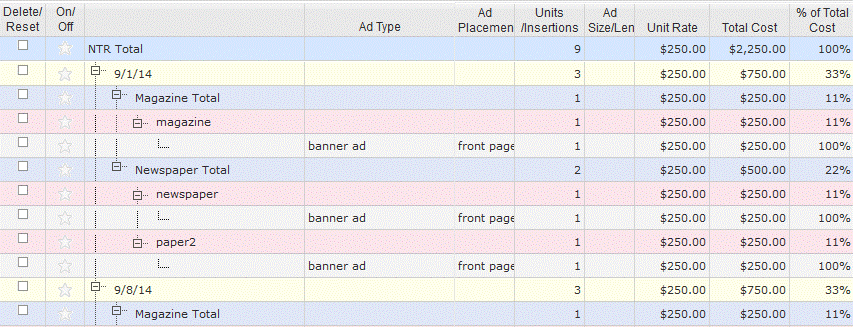
• Week Distribution — shows rows grouped by week, station or vendor, and daypart or ad type. To show individual total weeks,select the Show Flight Detail option. In the following images, individual total weeks are displayed because the Show Flight Detail option is selected.
Radio Week Distribution view...

NTR Week Distribution view...

• Daypart or Ad Type Distribution — shows rows grouped by daypart or ad type, week, and station or vendor.
Daypart Distribution view...

Ad Type Distribution view...

• Daypart Code or Ad Placement Distribution — shows rows grouped by daypart code or ad placement, week, and station or vendor.
Daypart Code Distribution view...

Ad Placement Distribution view...

2. Select Show Flight Detail from the Layouts menu to show rows for each week in the flight.
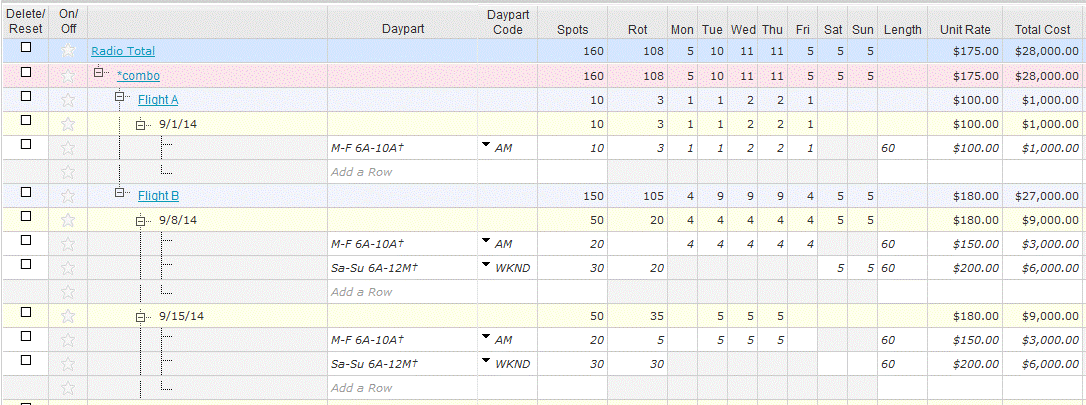
3. Select Spot or Unit/Insertion Placement from the Layouts menu to show days of the week for spot/unit placement in each row.
![]() Spot or unit/insertion placement works with any distribution layout. You can hide the view of all days and return to a single spots or units column again by clicking to clear the checkbox.
Spot or unit/insertion placement works with any distribution layout. You can hide the view of all days and return to a single spots or units column again by clicking to clear the checkbox.
Spot Placement view...
A row may have different spot placements in different weeks within the same flight. Spot placements must be entered with the Show Flight Detail option selected from the Layouts menu.

When Show Flight Detail is unchecked, the Spot Placement view shows average week spot placement. Decimal values appear if spots were placed differently in different weeks:

Unit/Insertion Placement view...

4. Click the  Expand/Collapse All Rows buttons in the toolbar to show only the total rows or all rows in each group in the schedule grid.
OR click the checked box to clear the Expand Grid by Default option in the Layouts menu and collapse the rows.
 Tapscan controls row expansion after your schedule reaches a certain number of rows. At that point only the top two levels will expand. The grand total level will always expand. Different distribution views may expand to different degrees.
Related topics...